
Portal
Ondorse's white-label onboarding solution that creates a fluid and smart customer experience with auto-fill, suggestions, and high visual customization.
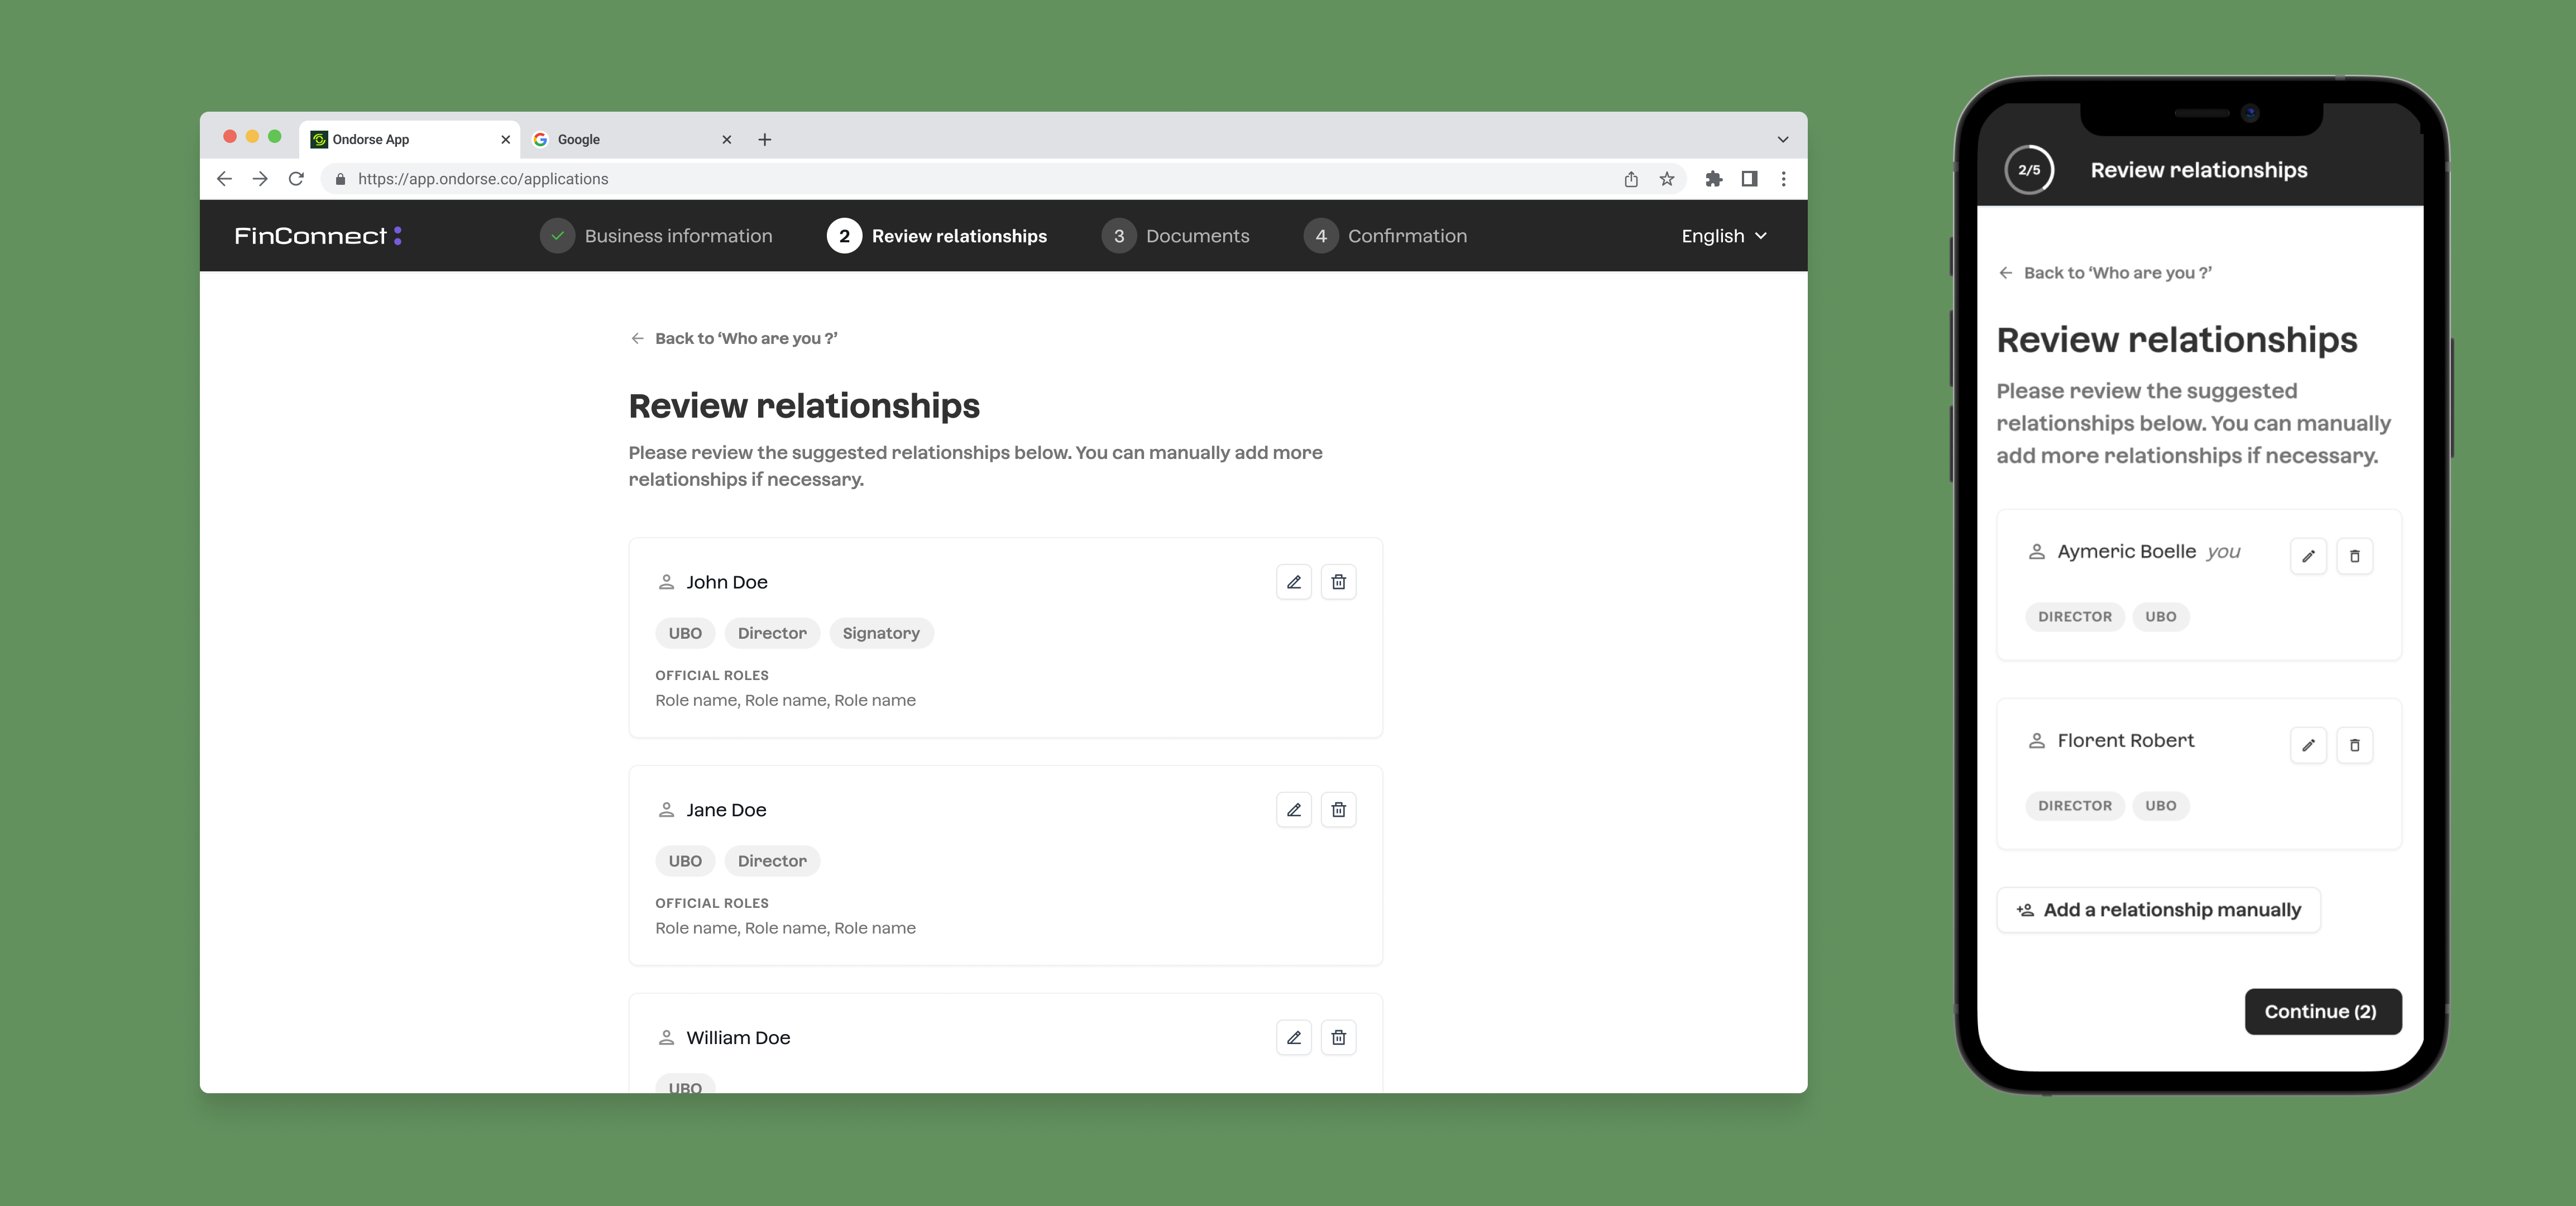
Portal is Ondorse's white-label onboarding solution. It helps you create a fluid and smart experience for your customers by integrating features such as auto-fill and suggestions. It leverages the know-how of Ondorse in business and individual onboarding while supporting a high degree of visual customisation.
You can easily generate a Portal link and send it to your customer so that they fill in your compliance questions and documents. Once submitted, a case will be created and sent into Ondorse case management to be treated by your team.
Ondorse Portal is fully customisable. Learn more about customisations option in Portal configuration options.
You can follow the portal requests currently in flight via the Portal requests tracker:
Each portal is unique and persistent. It means that, until submitted, a customer can go back to its portal page to add more information or edit it.
Portal's features include:
- Search bar on entity names or registration number, with auto-complete to ease the search
- Auto-fill of fields powered by official register connections to reduce the burden on your customer and maximise conversion rate (note that customers can always edit and modify this information)
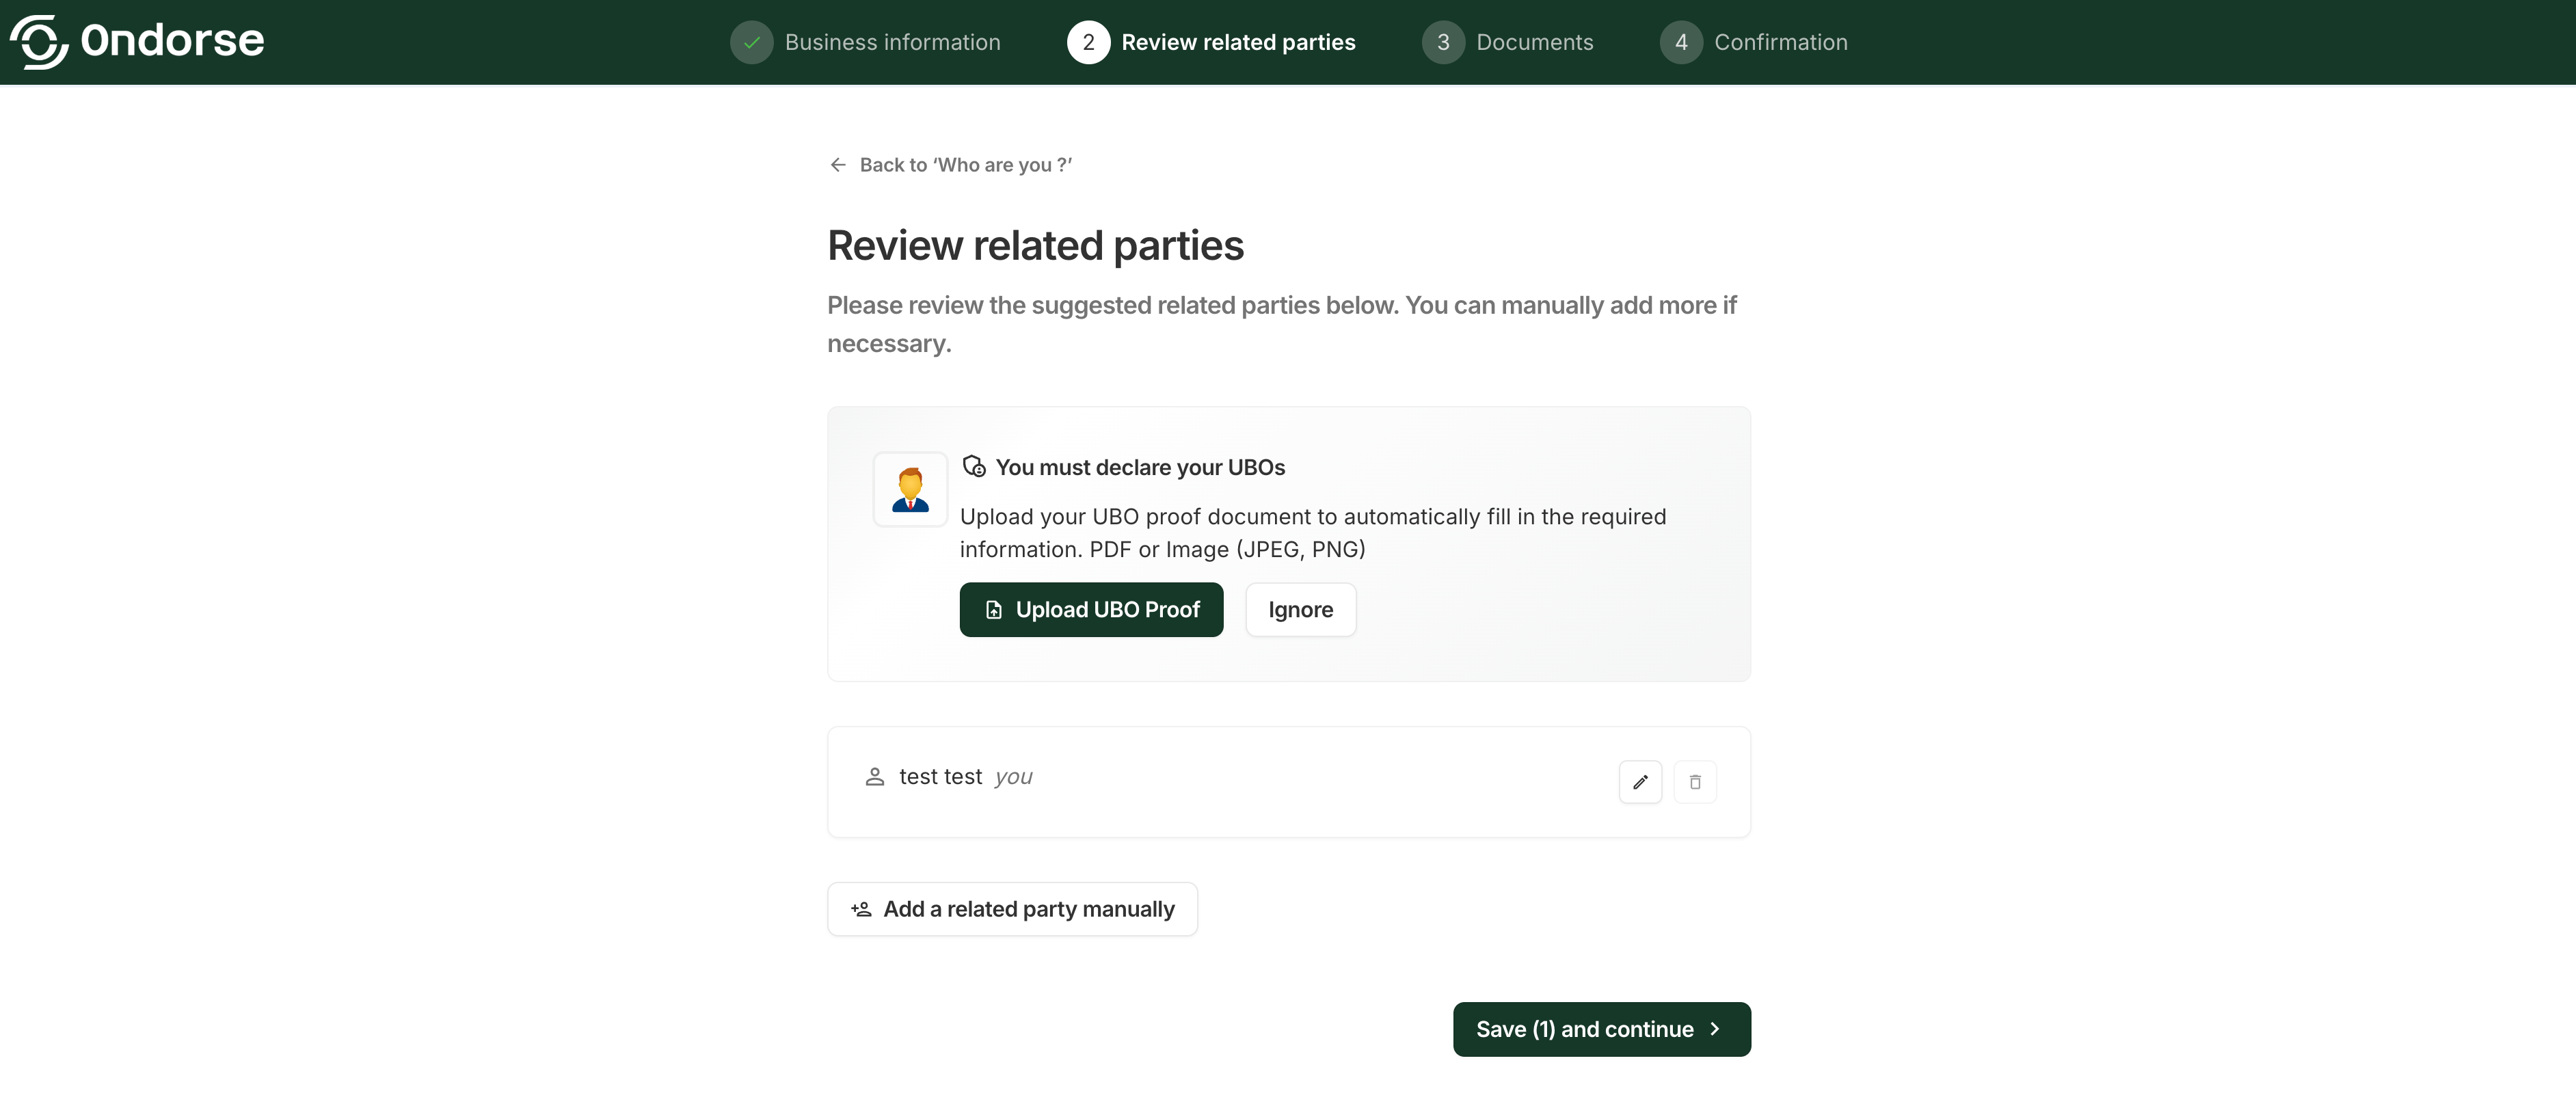
- Relationships (natural persons or entities) smart suggestions for directors and UBOs, depending on data availability
- Responsive design to fit seamlessly on any screen size
Auto-fill from registries or from documents
Auto-fill from registries: user can just enter the name of the company and the portal will auto-fill fields from the data present in official registries. Reduce the burden on your customer and maximise conversion rate (note that customers can always edit and modify this information).
Auto-fill from document (beta): the user can upload a document, like a UBO proof, and let the portal will extract the data and pre-fill the fields with the data of the document.
Leveraging portals for fast, flexible, and compliant onboarding
Portals empower your team to implement tailored onboarding strategies that balance speed and compliance. They enable a light-touch approach for low-risk clients, streamlining onboarding to be as quick and frictionless as possible.
At the same time, they support more rigorous checks for enhanced due diligence, stock remediation, and KYC/B reviews. Compliance analysts can reopen the portal at any point during onboarding or the customer lifecycle to request corrections, clarifications, or additional documents. This can be done manually or automated through API integration.
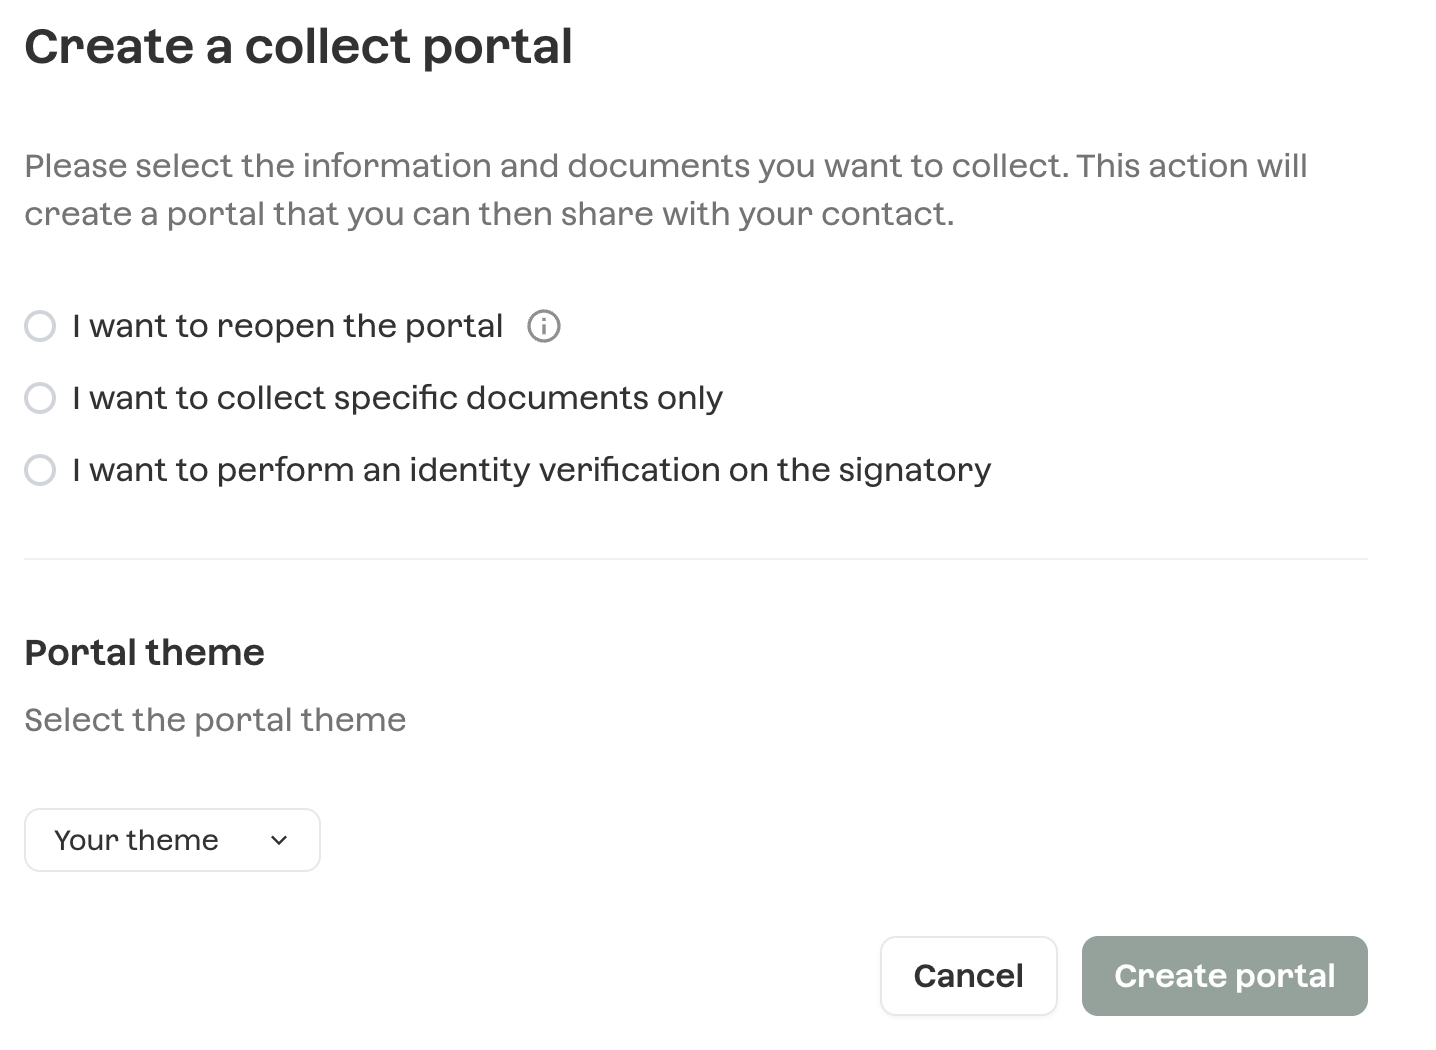
Manual collect portal selection
Specifically you can address the following scenarios:
- Document re-collection or identity verification retakes when initial documents are not correct or identity verifications fail after submission
- Enhanced due diligence if new risks emerge post-submission.
- Progressive onboarding, allowing you to:
- begin with only essential (or no) documents
- onboard low-risk clients while giving them time to provide missing information or identity verifications
- and request the full set of documents immediately from high-risk clients.
- Re-KYC by reopening the portal with previously submitted data, requesting only the documents that are no longer valid.
- Stock remediation by creating cases in Ondorse using existing documents, enriching them with registry data, and asking clients only for the missing pieces.
See schema below for possible collect strategies

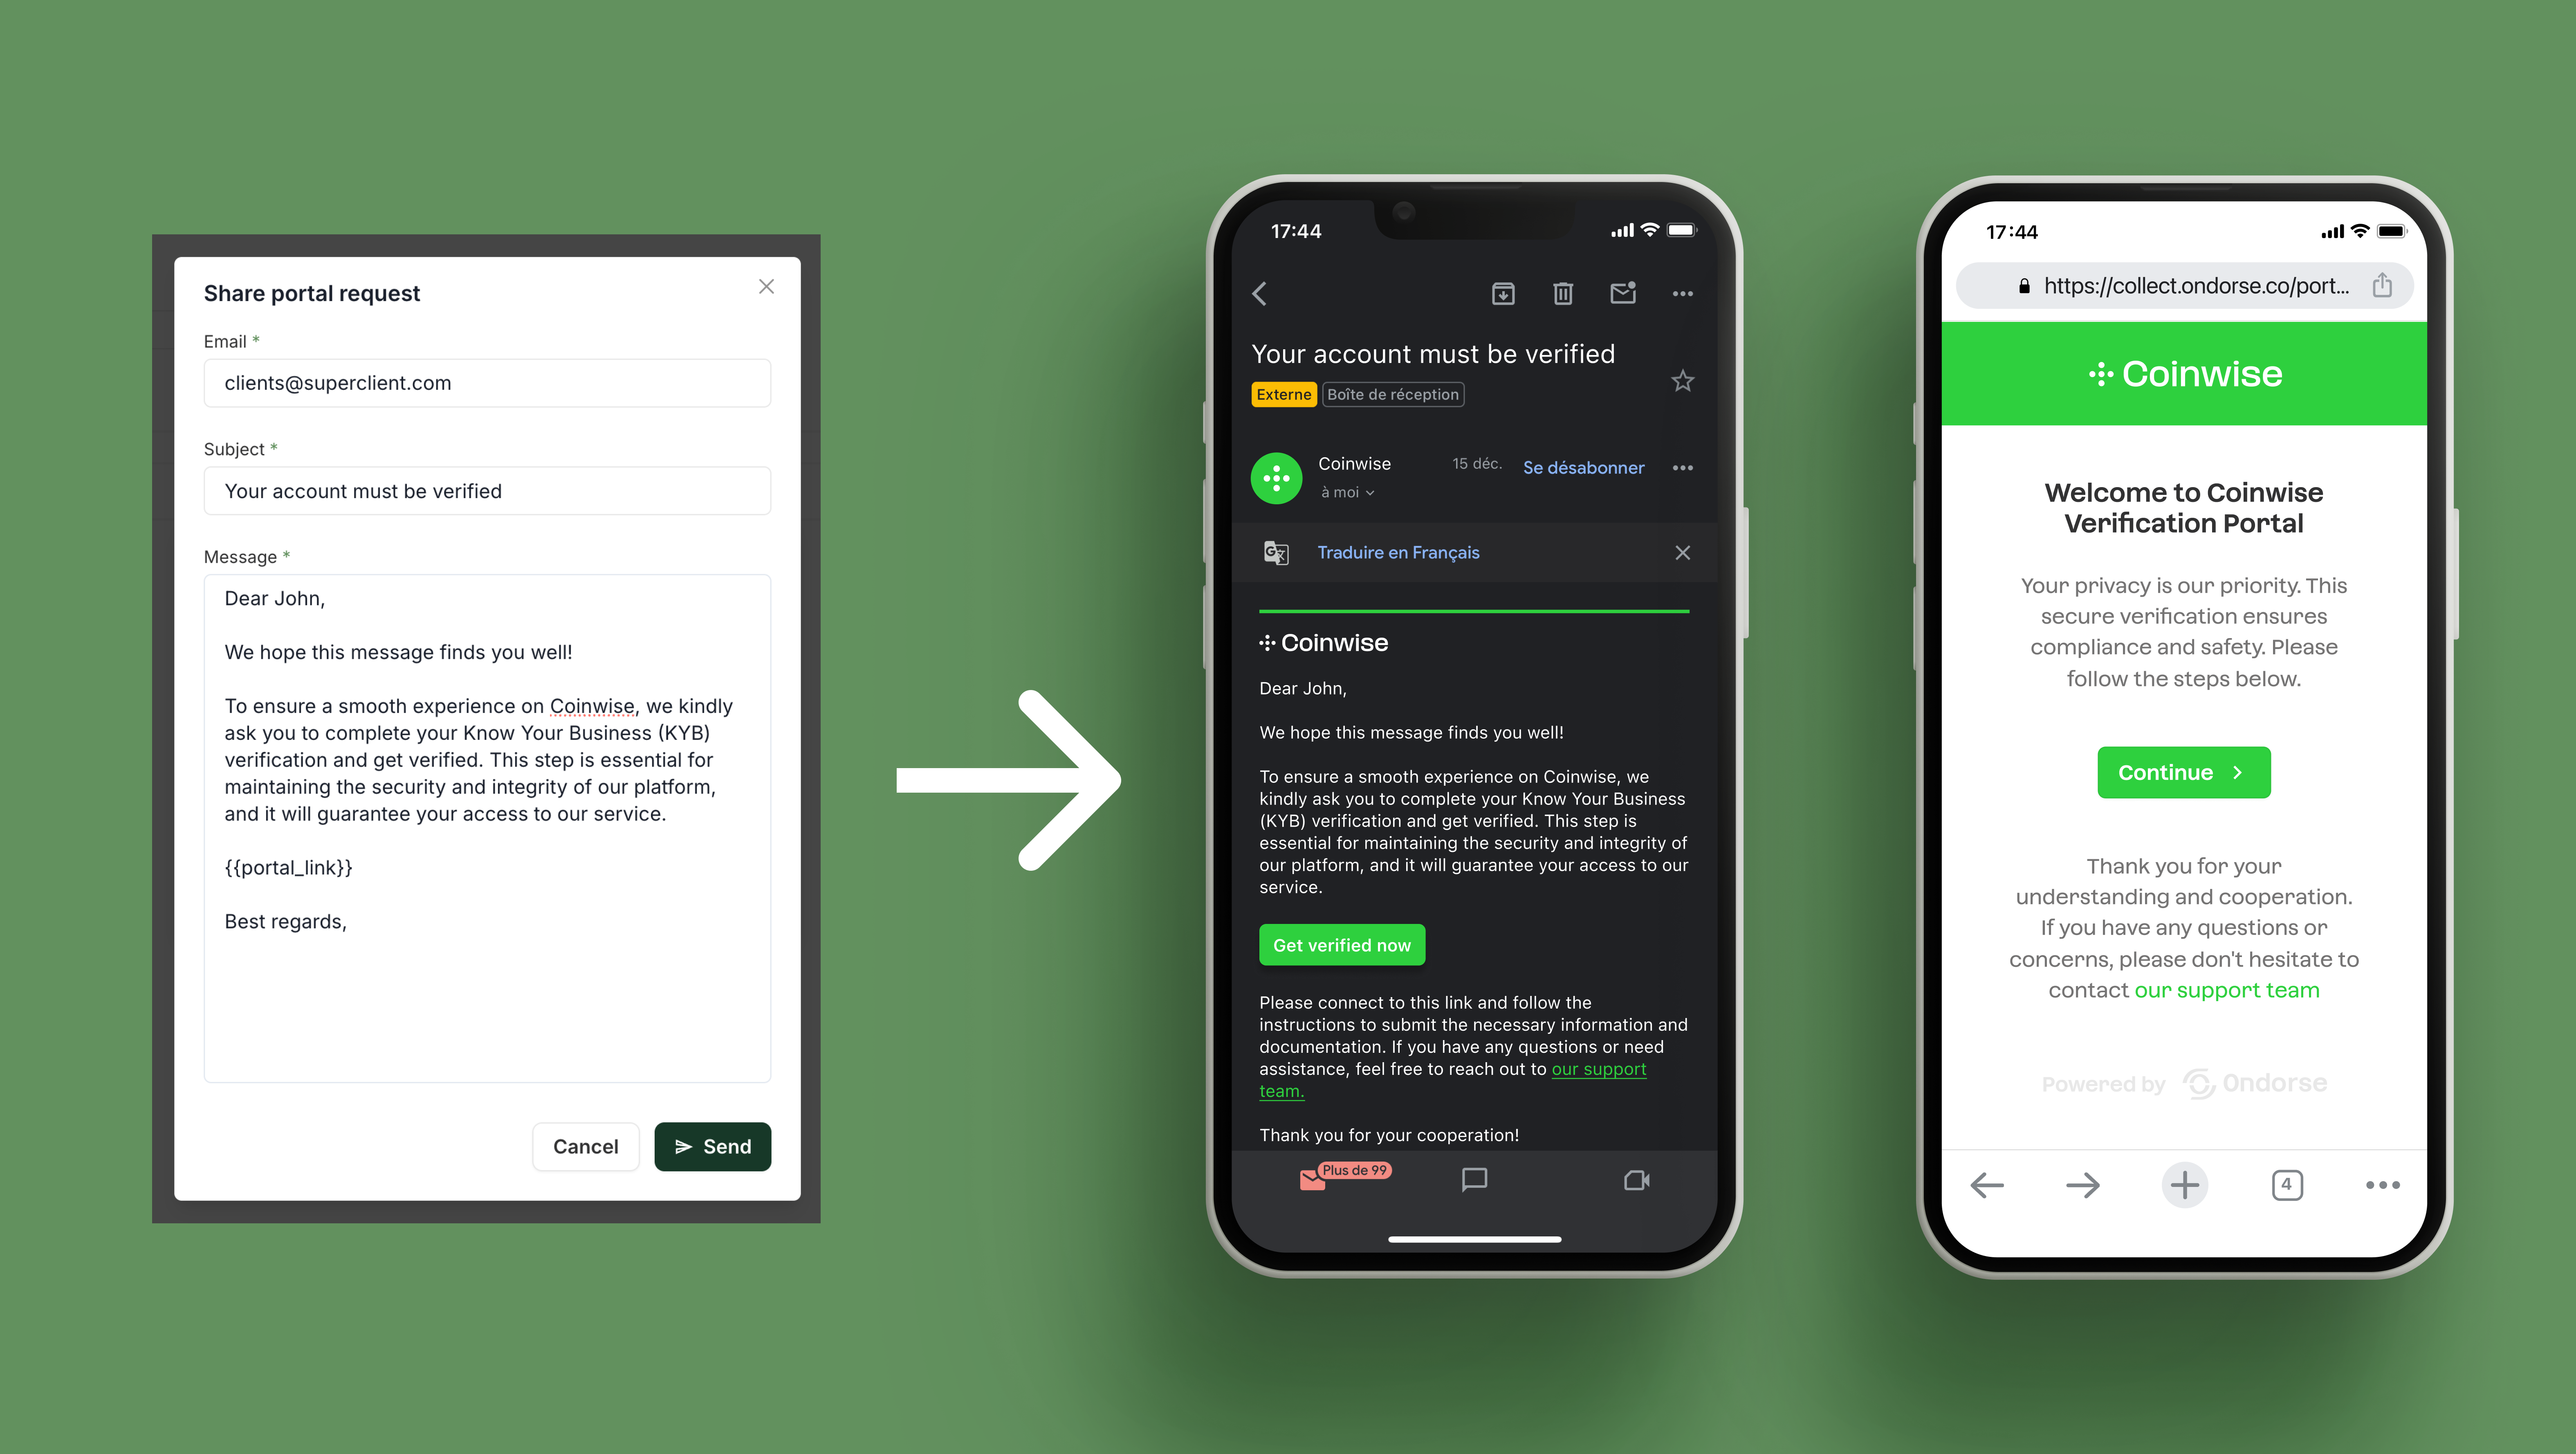
Send portal requests by email
You can send portal requests via email directly from Ondorse's interface, with emails automatically matching your brand.
Alternatively, you can choose to send them through your own email provider or customer engagement platform so that you have a greater control.
Updated 4 months ago